
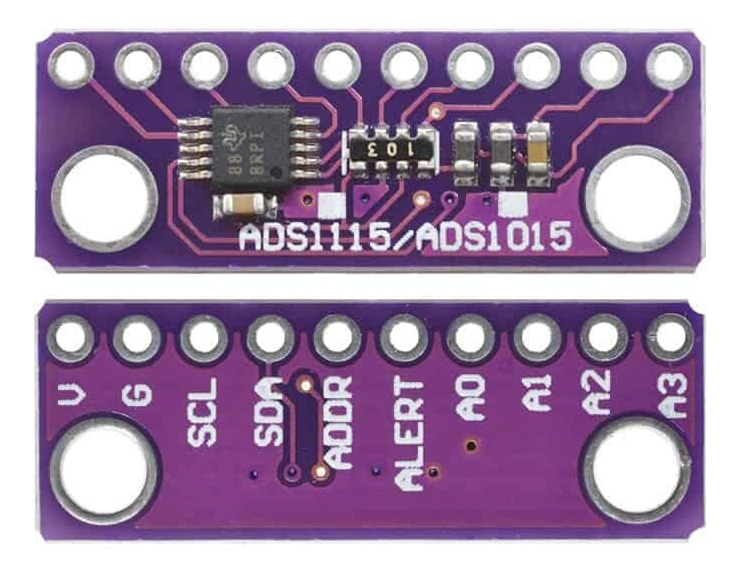
L’ADC interne de l’ESP32 n’étant pas assez précis pour mesurer une tension alternative nous utiliserons un ADC externe, j’ai choisi l’ADS1015 de Texas Instruments.
L’ADS1015 permet de capturer jusqu’à 3300 échantillons par seconde soit un échantillon toutes les 303µs, largement suffisant pour mesurer un courant dont un cycle complet dure 20ms. La résolution sur ce modèle est de 12 bits (4096 points).
L’ébauche qui suit nous permet de faire une première capture sur une charge purement résistive (un radiateur), donc pas de décalage de phase, Puissance apparente = Puissance active.
Nous utiliserons la bibliothèque Adafruit :
#include <Arduino.h>
#include <Adafruit_ADS1X15.h>
#include <Adafruit_BusIO_Register.h>

Adafruit_ADS1015 ads;     /* Use this for the 12-bit version */

// Pin connected to the ALERT/RDY signal for new sample notification.
constexpr int READY_PIN = 23;

// This is required on ESP32 to put the ISR in IRAM. Define as
// empty for other platforms. Be careful - other platforms may have
// other requirements.
#ifndef IRAM_ATTR
#define IRAM_ATTR
#endif

volatile bool new_data = false;
void IRAM_ATTR NewDataReadyISR() {
  new_data = true;
}

void setup(void)
{
  Serial.begin(115200);
  Serial.println("Hello!");

  Serial.println("Getting simple reading from AIN0");
  Serial.println("ADC Range: +/- 4.096V (1 bit = 2mV/ADS1015)");

  Serial.println("millis;ADC;mV");

  Serial.println("ads.getGain() : ");
  Serial.println(ads.getGain());
  Serial.println("");

  // The ADC input range (or gain) can be changed via the following
  // functions, but be careful never to exceed VDD +0.3V max, or to
  // exceed the upper and lower limits if you adjust the input range!
  // Setting these values incorrectly may destroy your ADC!
  //                                                                ADS1015  ADS1115
  //                                                                -------  -------
  // ads.setGain(GAIN_TWOTHIRDS);  // 2/3x gain +/- 6.144V  1 bit = 3mV      0.1875mV (default)
  ads.setGain(GAIN_ONE);           // 1x gain   +/- 4.096V  1 bit = 2mV      0.125mV
  // ads.setGain(GAIN_TWO);        // 2x gain   +/- 2.048V  1 bit = 1mV      0.0625mV
  // ads.setGain(GAIN_FOUR);       // 4x gain   +/- 1.024V  1 bit = 0.5mV    0.03125mV
  // ads.setGain(GAIN_EIGHT);      // 8x gain   +/- 0.512V  1 bit = 0.25mV   0.015625mV
  // ads.setGain(GAIN_SIXTEEN);    // 16x gain  +/- 0.256V  1 bit = 0.125mV  0.0078125mV

  Serial.println("ads.getGain() : ");
  Serial.println(ads.getGain());
  Serial.println("");

  Serial.println("ads.getDataRate() : ");
  Serial.println(ads.getDataRate());
  Serial.println("");
  ads.setDataRate(RATE_ADS1015_3300SPS);
  Serial.println("ads.getDataRate() : ");
  Serial.println(ads.getDataRate());
  Serial.println("");

  if (!ads.begin()) {
    Serial.println("Failed to initialize ADS.");
    while (1);
  }

  pinMode(READY_PIN, INPUT);
  // We get a falling edge every time a new sample is ready.
  attachInterrupt(digitalPinToInterrupt(READY_PIN), NewDataReadyISR, FALLING);

  // Start continuous conversions.
  ads.startADCReading(ADS1X15_REG_CONFIG_MUX_SINGLE_0, /*continuous=*/true);

}

void loop(void)
{
  // If we don't have new data, skip this iteration.
  if (!new_data) {
    return;
  }

  int16_t results = ads.getLastConversionResults();

  // Serial.print("Single ended : "); Serial.print(results); Serial.print("("); Serial.print(ads.computeVolts(results)); Serial.println("mV)");
  Serial.print(micros());
  Serial.print(";");

  Serial.print(millis());
  Serial.print(";");

  Serial.println(results);

  // Serial.print(ads.computeVolts(results));
  // Serial.println("");

  new_data = false;

}#include <Arduino.h>
#include <Adafruit_ADS1X15.h>
#include <Adafruit_BusIO_Register.h>
Adafruit_ADS1015 ads; /* Use this for the 12-bit version */
// Pin connected to the ALERT/RDY signal for new sample notification.
constexpr int READY_PIN = 23;
// This is required on ESP32 to put the ISR in IRAM. Define as
// empty for other platforms. Be careful - other platforms may have
// other requirements.
#ifndef IRAM_ATTR
#define IRAM_ATTR
#endif
volatile bool new_data = false;
void IRAM_ATTR NewDataReadyISR() {
new_data = true;
}
void setup(void)
{
Serial.begin(115200);
Serial.println("Hello!");
Serial.println("Getting simple reading from AIN0");
Serial.println("ADC Range: +/- 4.096V (1 bit = 2mV/ADS1015)");
Serial.println("millis;ADC;mV");
Serial.println("ads.getGain() : ");
Serial.println(ads.getGain());
Serial.println("");
// The ADC input range (or gain) can be changed via the following
// functions, but be careful never to exceed VDD +0.3V max, or to
// exceed the upper and lower limits if you adjust the input range!
// Setting these values incorrectly may destroy your ADC!
// ADS1015 ADS1115
// ------- -------
// ads.setGain(GAIN_TWOTHIRDS); // 2/3x gain +/- 6.144V 1 bit = 3mV 0.1875mV (default)
ads.setGain(GAIN_ONE); // 1x gain +/- 4.096V 1 bit = 2mV 0.125mV
// ads.setGain(GAIN_TWO); // 2x gain +/- 2.048V 1 bit = 1mV 0.0625mV
// ads.setGain(GAIN_FOUR); // 4x gain +/- 1.024V 1 bit = 0.5mV 0.03125mV
// ads.setGain(GAIN_EIGHT); // 8x gain +/- 0.512V 1 bit = 0.25mV 0.015625mV
// ads.setGain(GAIN_SIXTEEN); // 16x gain +/- 0.256V 1 bit = 0.125mV 0.0078125mV
Serial.println("ads.getGain() : ");
Serial.println(ads.getGain());
Serial.println("");
Serial.println("ads.getDataRate() : ");
Serial.println(ads.getDataRate());
Serial.println("");
ads.setDataRate(RATE_ADS1015_3300SPS);
Serial.println("ads.getDataRate() : ");
Serial.println(ads.getDataRate());
Serial.println("");
if (!ads.begin()) {
Serial.println("Failed to initialize ADS.");
while (1);
}
pinMode(READY_PIN, INPUT);
// We get a falling edge every time a new sample is ready.
attachInterrupt(digitalPinToInterrupt(READY_PIN), NewDataReadyISR, FALLING);
// Start continuous conversions.
ads.startADCReading(ADS1X15_REG_CONFIG_MUX_SINGLE_0, /*continuous=*/true);
}
void loop(void)
{
// If we don't have new data, skip this iteration.
if (!new_data) {
return;
}
int16_t results = ads.getLastConversionResults();
// Serial.print("Single ended : "); Serial.print(results); Serial.print("("); Serial.print(ads.computeVolts(results)); Serial.println("mV)");
Serial.print(micros());
Serial.print(";");
Serial.print(millis());
Serial.print(";");
Serial.println(results);
// Serial.print(ads.computeVolts(results));
// Serial.println("");
new_data = false;
}On démarre le moniteur série à 115200bps, ici j’utilise Realterm pour capturer le flux venant du port série vers un fichier csv.
Et voilà le resultat :

Bonjour et merci du partage de votre code.
Puis je savoir quelle source de courant votre ads mesure t elle ? J imagine qu’il n’est pas connecté au 230v … donc quel composant avez vous placé qui ne perturbe pas le signal ?
Merci
Bonjour,
Cela fait maintenant plus de 2 ans que j’ai fait ce montage et si mes souvenirs sont bons, j’ai réalisé cette mesure avec un transformateur de courant.
Aux bornes de ce transformateur de courant j’y ai placé une résistance de shunt de 25W puis j’ai mesuré la chute de tension aux bornes de cette résistance à l’aide de l’ADS1015.
J’ai retrouvé la référence du transformateur et de la résistance :
– https://fr.rs-online.com/web/p/transformateurs-de-courant/7754912
– https://fr.rs-online.com/web/p/resistances-a-montage-sur-chassis/1623594
Bien à vous.